
AuthnIdentity Docs
Slack SAML Integration Guide
This guide will help you configure Slack with AuthnIdentity as your identity provider using SAML 2.0.
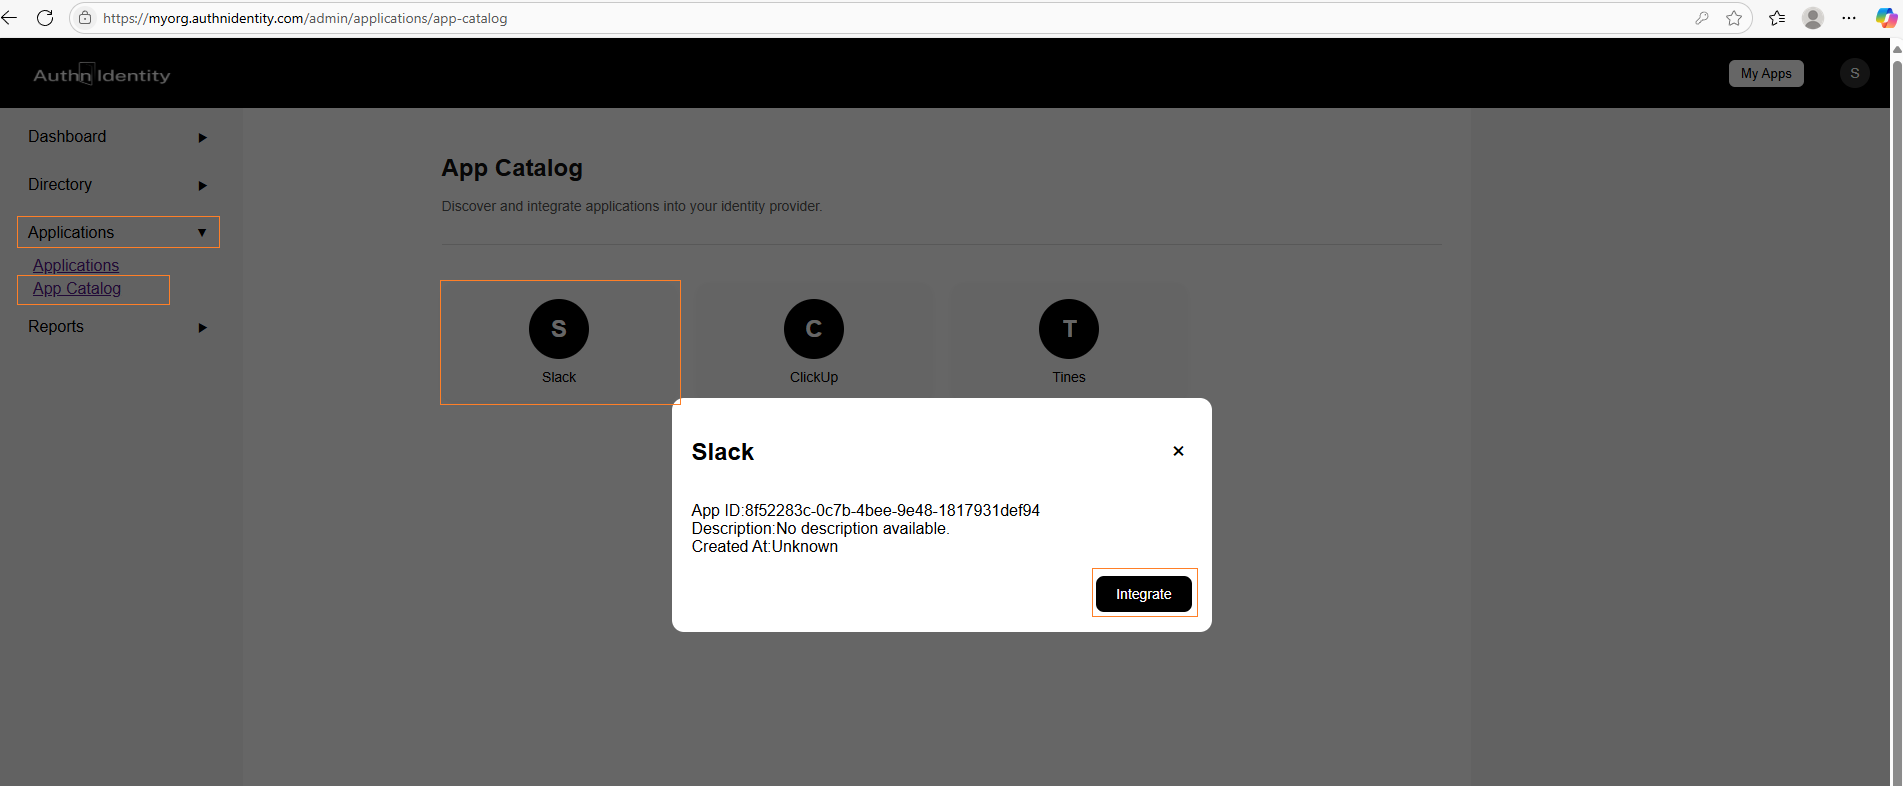
Step 1: Create Slack Application
- Go to Applications > App Catalog.
- Select Slack from the list.
- Click on the Integrate button.
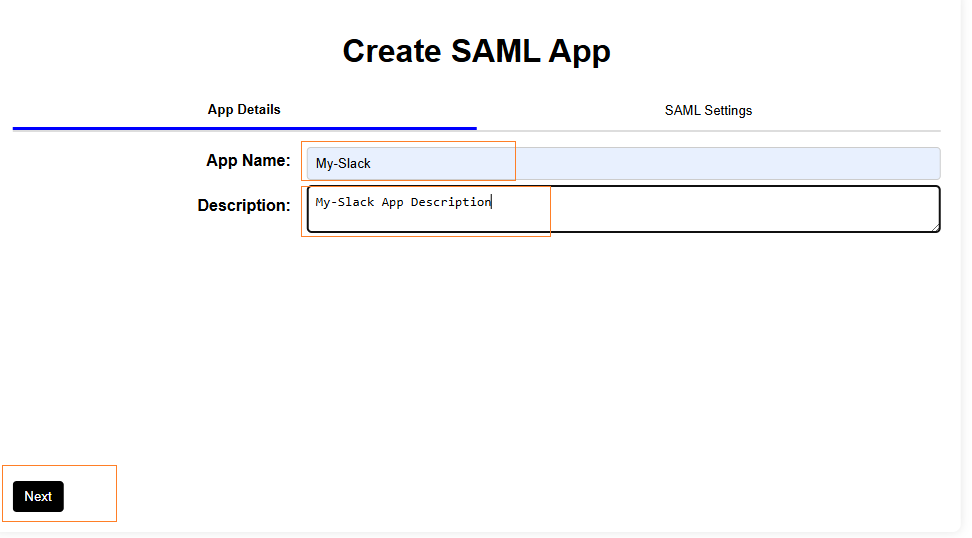
Step 2: Provide App Details
- Fill out:
- App Name: Slack
- Description: (optional)
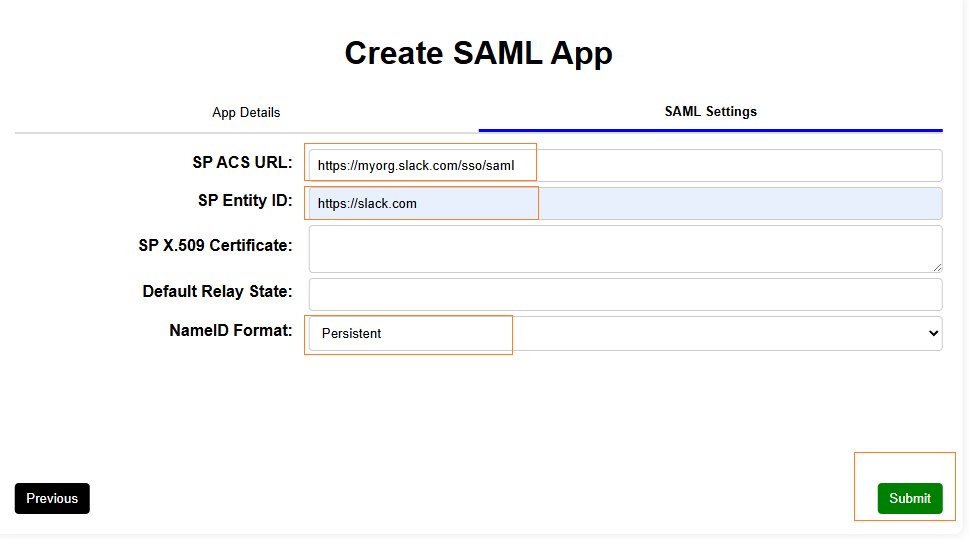
- In the SAML Settings tab, provide:
- SP ACS URL: e.g.,
https://myorg.slack.com/sso/saml - SP Entity ID:
https://slack.com - SP X.509 Certificate: Skip
- Default Relay State: Skip
- NameID Format: Persistent
- SP ACS URL: e.g.,
- Click Submit to save.
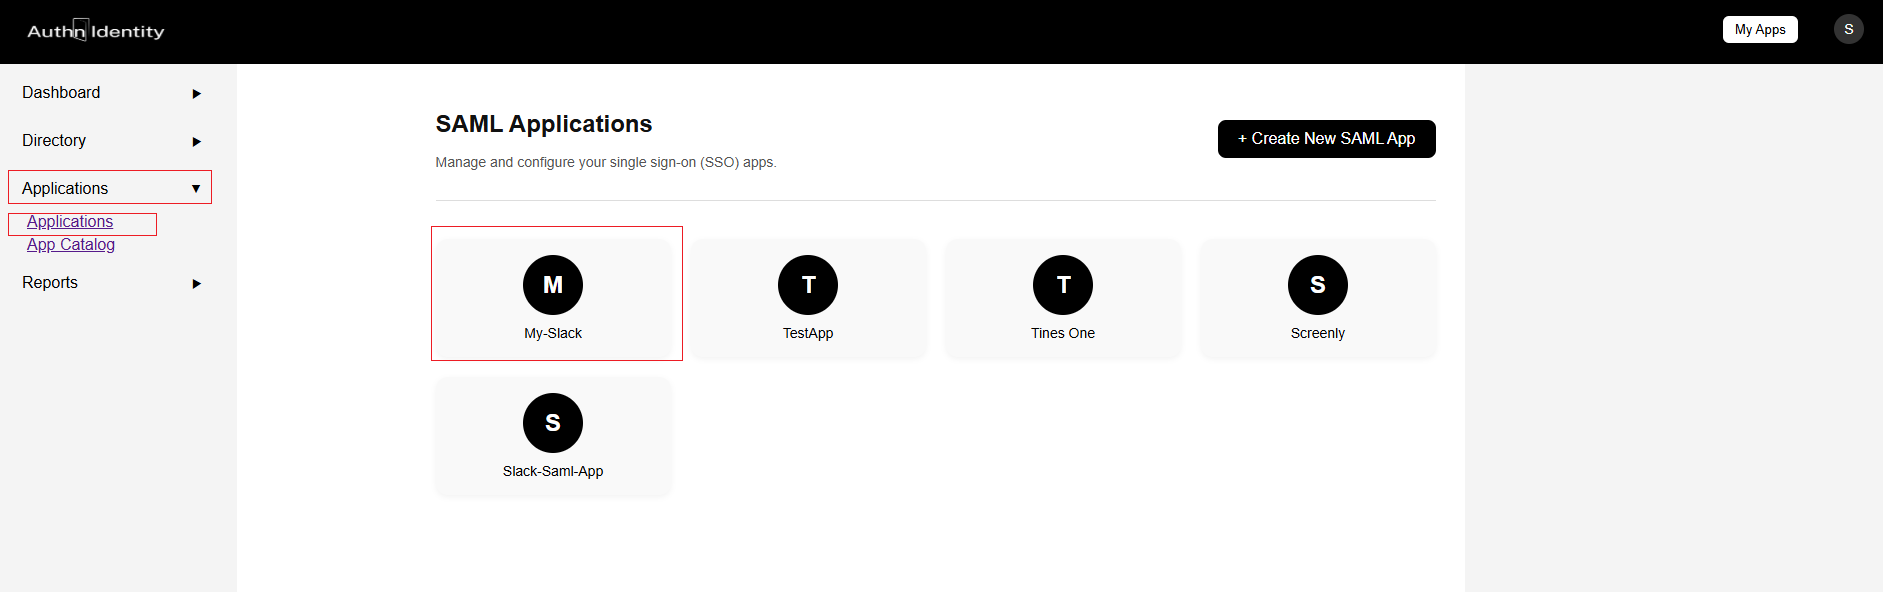
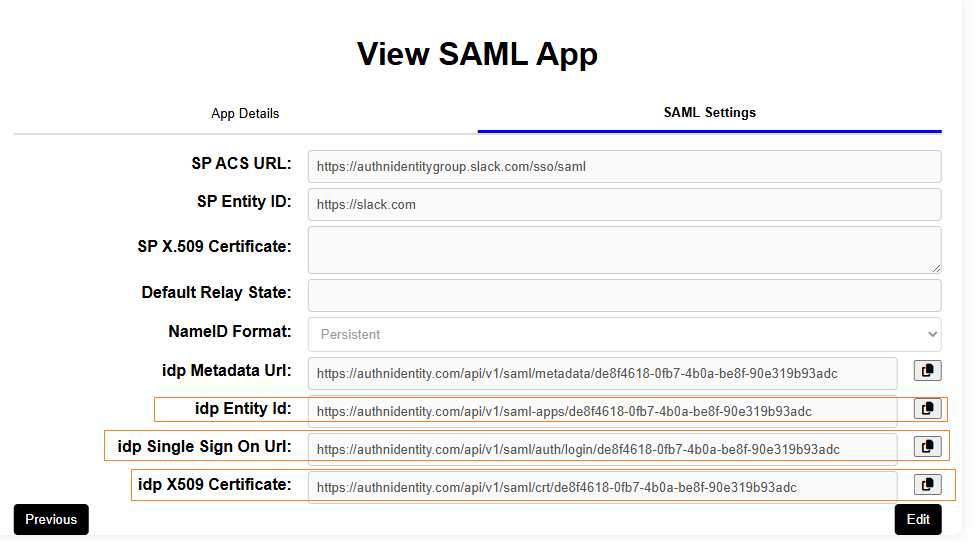
Step 3: Copy IdP Settings
- Go to Applications > Applications.
- Open the newly created Slack app.
- Go to the SAML Settings tab.
- Note down:
- IdP Single Sign-On URL
- IdP Entity ID
- IdP X.509 Certificate
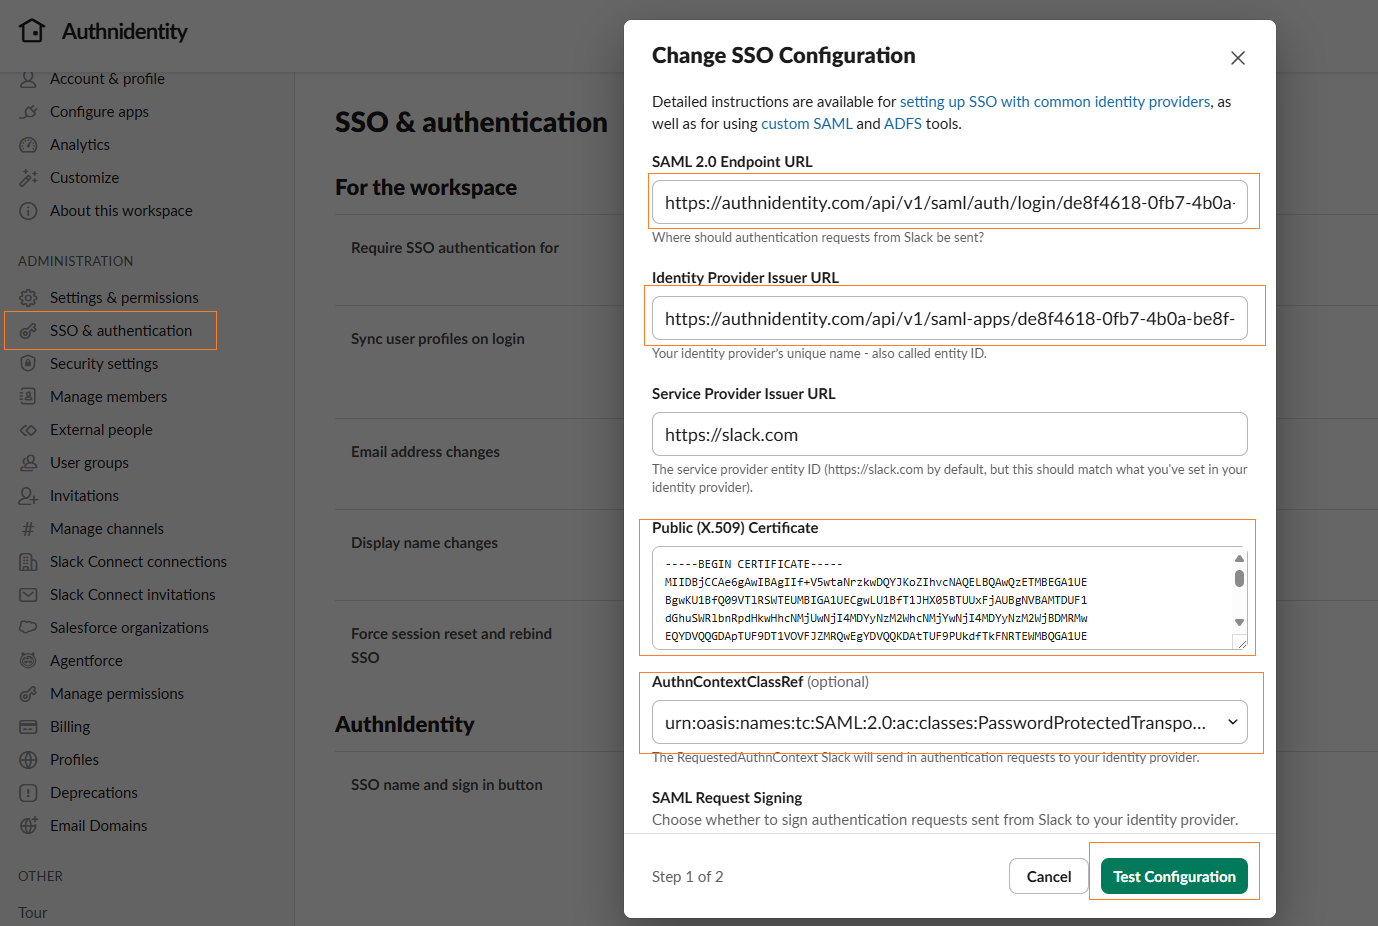
Step 4: Configure Slack
- Go to your Slack admin page: eg. https://myorg.slack.com/home
- Navigate to SSO & Authentication → Edit Configuration.
- Provide these fields:
- SAML 2.0 Endpoint URL: copy from IdP Single Sign-On URL
- Identity Provider Issuer: copy from IdP Entity ID
- Service Provider Issuer:
https://slack.com - Public (X.509) Certificate: open the IdP X.509 certificate URL in a browser, download it, then copy-paste its contents here
- AuthnContextClassRef: default
- SAML Response Signing: select Sign the Response and Sign the Assertion
- Save your Slack configuration.
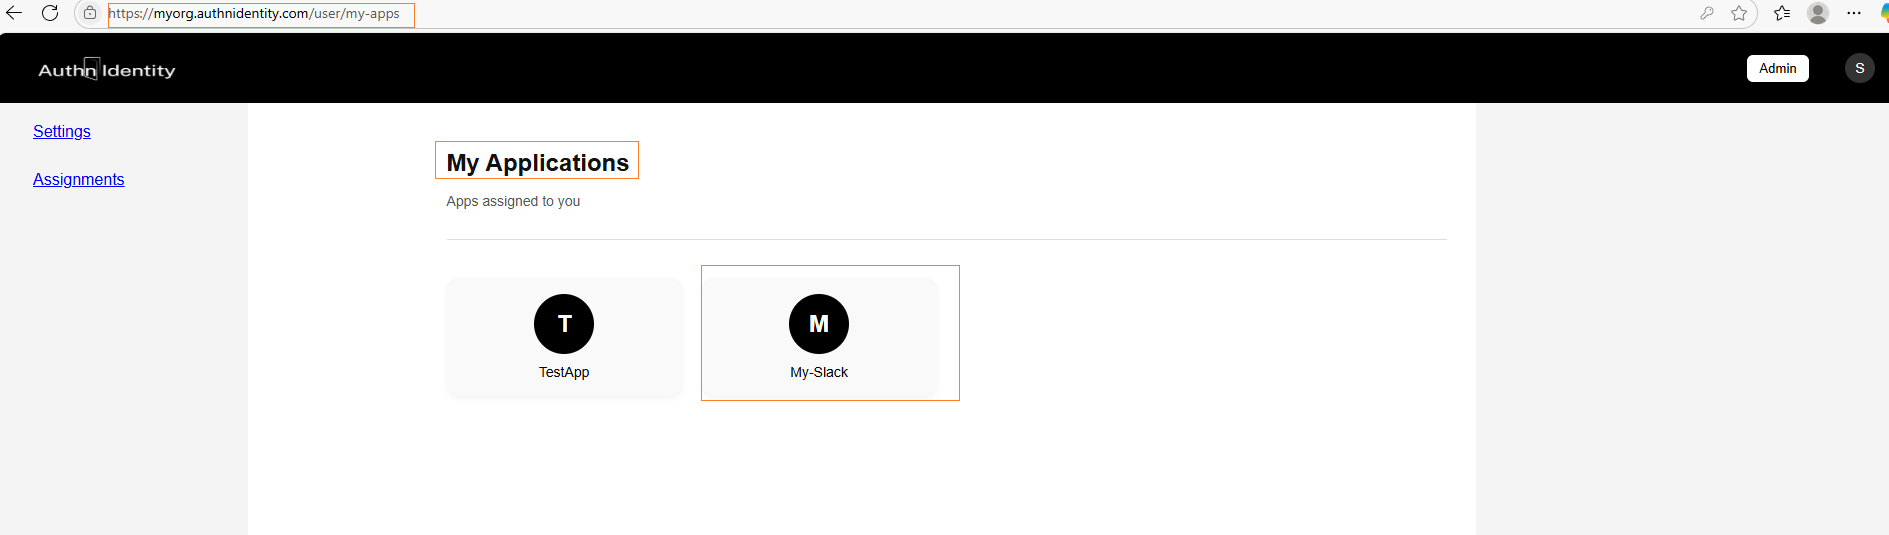
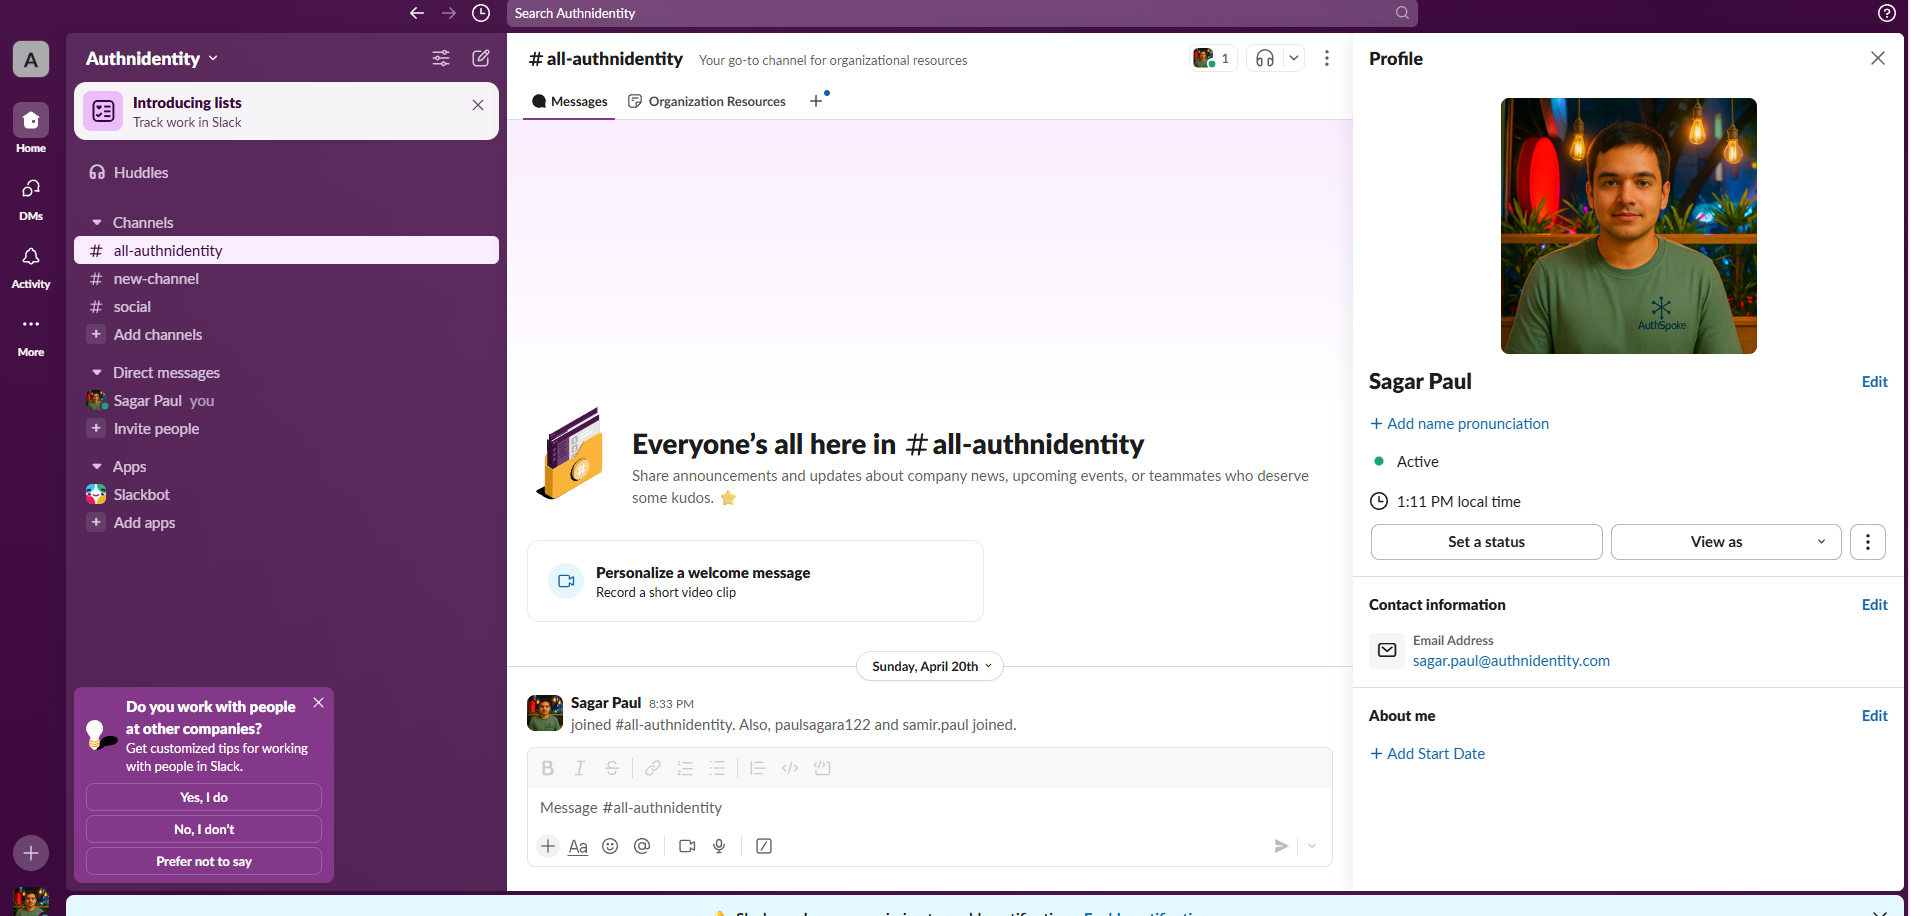
Step 5: Test the Integration
Go to My Apps in AuthnIdentity, click the Slack app, and you will be redirected to Slack. If successful, you should be logged in automatically using SAML.
Tip: If you experience errors, verify the ACS URL, certificate validity, and attribute mappings match exactly on both AuthnIdentity and Slack.
Need Support?
Contact sagar.paul@authnidentity.com or visit our Support Portal for more help.